2014-12-26 Manage my wine cellar with QR codes and Microsoft Azure
I have quite "few" bottles of wine. I really do like wine a lot. Yes, I'm French ![]() As for any resource you use a lot with lots of new items in and out almost every day, you start to have mistakes in your inventory. That's what happen naturally to any inventory. And you need to rebuild it time to time to check if it's still correct or not.
As for any resource you use a lot with lots of new items in and out almost every day, you start to have mistakes in your inventory. That's what happen naturally to any inventory. And you need to rebuild it time to time to check if it's still correct or not.
For a very long time, I was using a simple Excel file to manage my wine cellar. With manually decreasing by handwriting the new number of bottles on each line. You can imagine how the line looks like when I have 12 bottles and drink them all between 2 inventory periods. Aalso adding new bottles manually on the paper was quite a challenge. So I needed to do the inventory at least 2 to 3 times a year.
I was thinking of doing something with barcode and a simple barcode reader. Finally, I never took the time to do it. But recently, I got the idea of using QR Codes, smartphones to recognize the QR Codes and a Cloud website to store everything.
I went naturally for Microsoft Azure for both the Website using ASP.NET + MVC + EntityFramework and a SQL Azure database. I would have been able to use PHP, Java or any web technology like this but my core skills are more on .NET and C# ![]() Note that for the usage I'm doing, the project hosting and database are fully free in Azure. So if you want to do the same, it will be fully free. So let see in 8 simple steps how to make this app.
Note that for the usage I'm doing, the project hosting and database are fully free in Azure. So if you want to do the same, it will be fully free. So let see in 8 simple steps how to make this app.
Step 1: Create the Azure Web Site from Visual Studio 2013
Visual Studio 2013 is the best development tool I've ever used (yes, I do use to test, competitive ones, time to time). Visual Studio have multiple versions and some are for free like Visual Studio Community.
You will need a Microsoft Azure subscription. To do this application, including the database, you won't have to pay anything at all. The free hosting and free database is largely enough. So first, click on Trial on the Azure page and follow the steps. You'll have to use an existing Microsoft Account (ex Live ID), then you'll have to put your credit card. This is for verification only, after the trial, you won't be charged, you'll be able to continue to use the free website and free database.
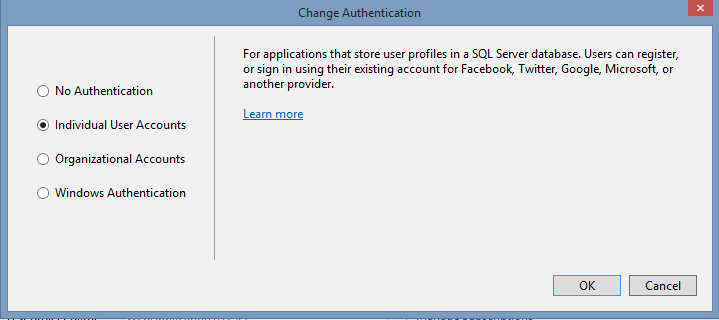
To create an Azure Website, you can follow the step by step documented here. What is important is to keep the Authentication mechanism into the website, so to select "Individual User Accounts". This is the only difference from the tutorial. I will use authentication in the web application to make sure not everyone can access some specific parts.
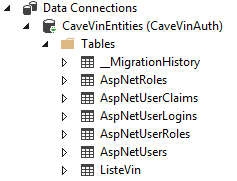
The project is now ready and you already have the ability to add new users. The AspNet* tables are used to manage the users and roles.
Every time a user is registered, the AspNetUsers is filled. As the basic pages does only contains email and password, those 2 are created. Note that the password is not stored, only the Hash code is for security reason. It's a good habit not to share any password in a database but either a crypted one or just the hash.

Step 2: create the Wine database
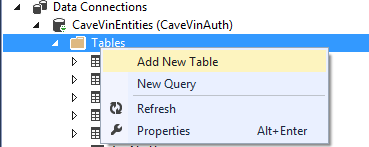
I made it super simple and straight forward: I've only created 1 table called "ListeVin" (WineList in English). Go to the Server management, select your Azure database and select manage it in the server explorer (you may get a message to update the firewall rules on Azure). Right click on Table from the database you've created with the website, select Add New Table.
You can then start creating new columns. In my case, I've created an Id which will be my primary key and can't be null. Then a region, description and placement ("rangement") which are text, a year ("annee"), quantity ("quantitee") and years to keep ("Agarder") which are integers. Yes, it's simple, I should have add the creation date, the last update, another table to keep track of the modifications, etc. But I'm more interested for this version to just the necessary.
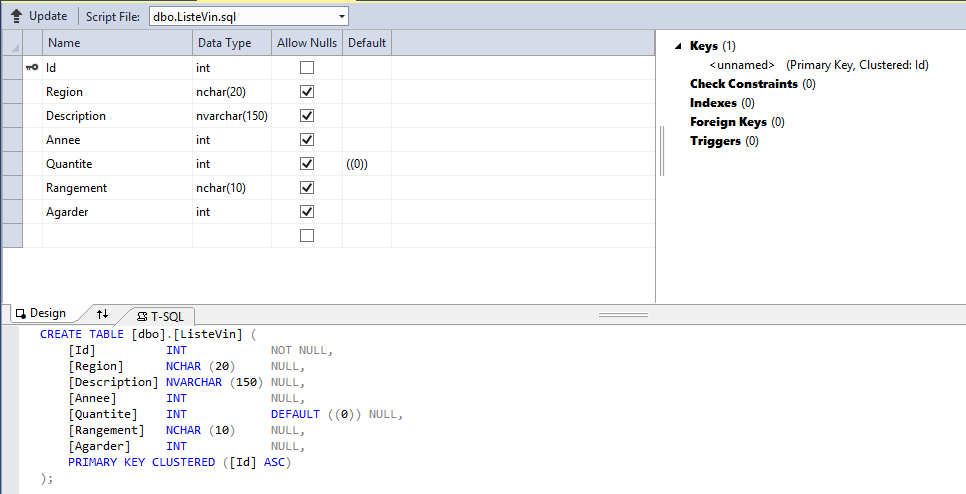
Once done, click on Update, and the database will the create.
Step 3: create the Model associated to this table
MVC means Model View Controller. The Model is the data part, the View is the page and the Controller is in the middle of the view and the data to perform advanced operations, manage some security, etc. So we need to add a Model first.
On Models in your project, right click, select "Add" then "New Item…" and "ADO.NET Entity Data Model".

Name it, then Add and select "EF Designer from database".
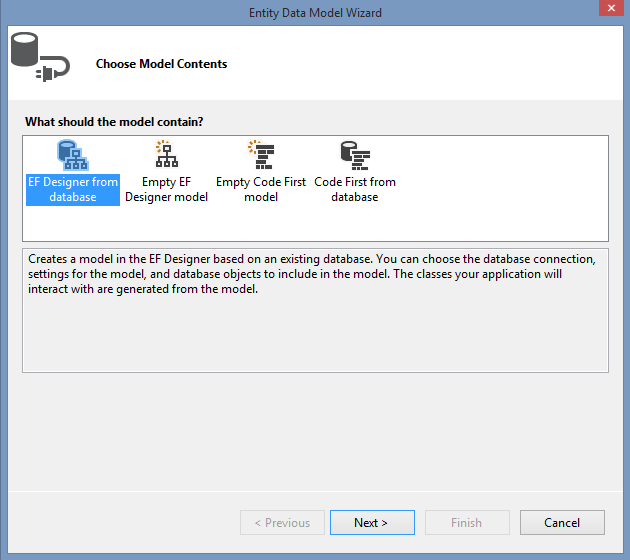
If you haven't setup the connection to the database, you'll need to do it selecting "New Connection"
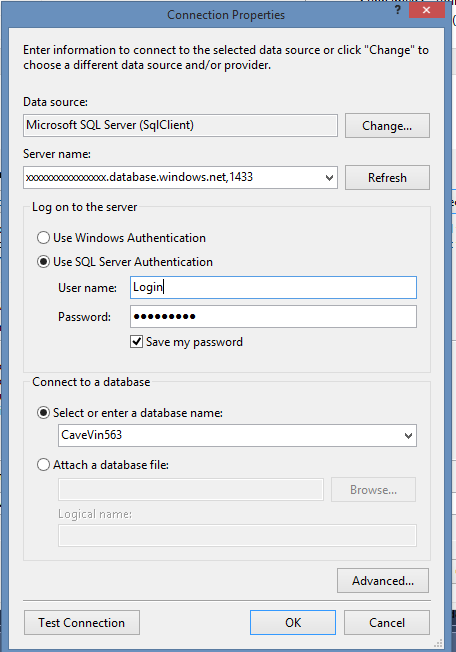
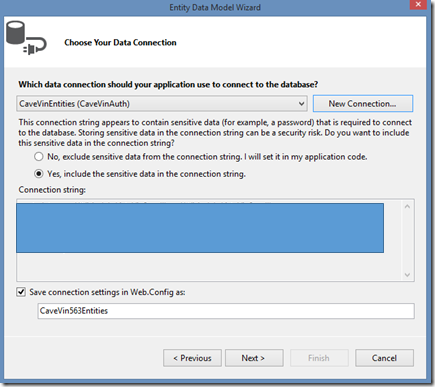
You can get the name of your database in the database properties or directly in the Azure portal. Select your database from the drop down list. The next step looks like this, you can include or not the login and password in the code or in the connection string. I'm adding it in the connection string.
In the next step, you select the table just created. Note you can select the other tables as well as views, store procedures and functions if you've created some.
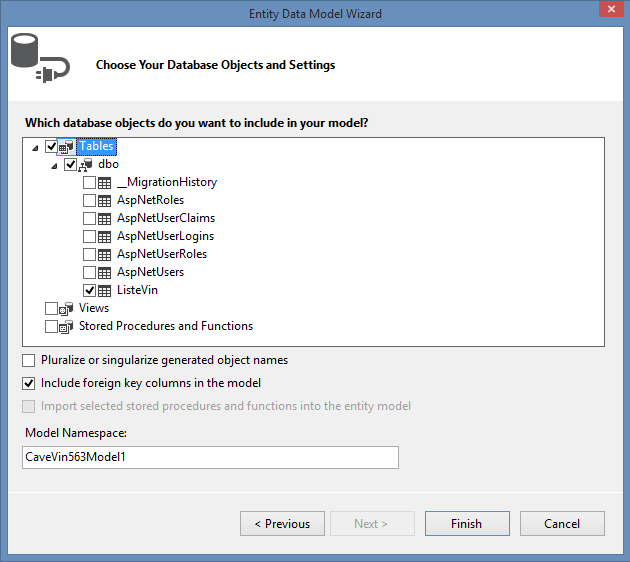
Just click on Finish and you'll get now your new entity created. The C# files has been created automatically and will make our life easier later on. There is no need to change anything to the generated code. You can have a look if you want to see all what you've avoided to do to access the database ![]()
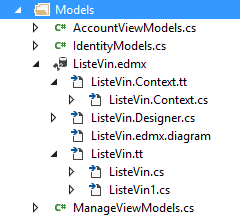
Rebuild the full project. It's important to make sure the Entity is recognize correctly.
Step 4: Create the Controller and the View
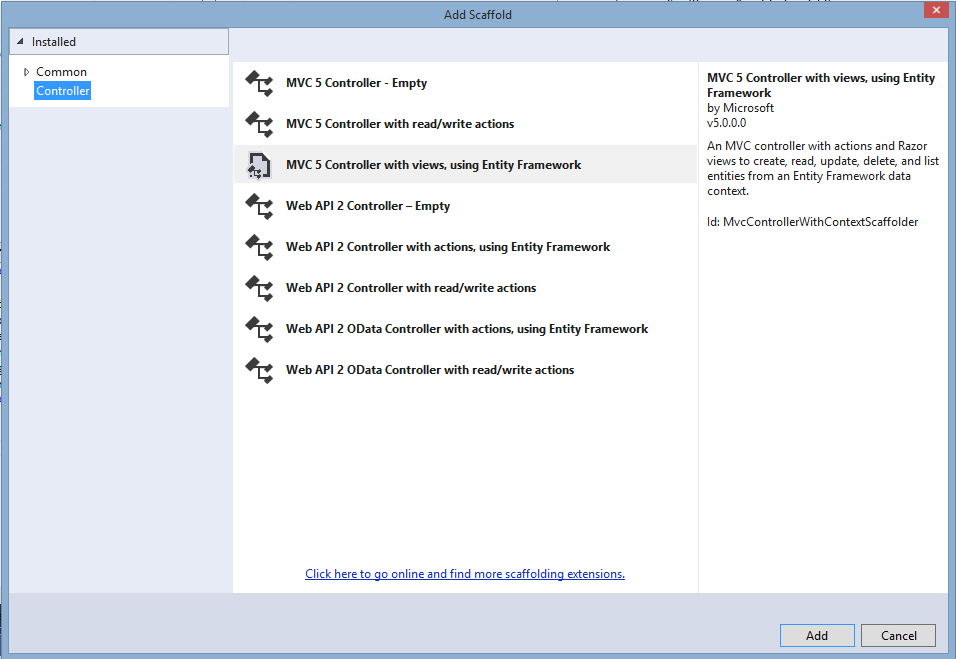
Right click on "Controllers" in the project, select "Controller…" and then "MVC 5 Controller with views, using Entity Framework" and click "Add"
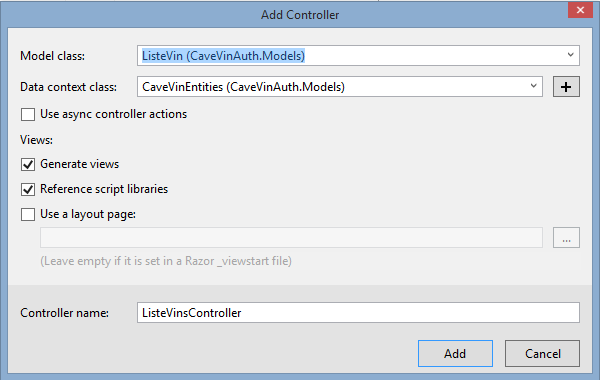
Select the created Model in the previous step as well as the entity in the drop down list. Name it "ListeVinsController", select "Generate views" at least and click "Add". You can also select the layout of the project or do it later in the code of the pages.
You're done for this step. It's the moment to test the app! Hit F5. You'll arrive on the default web page.
Change the URL by replacing "/home/index" by "/ListeVins". Please note that this name is the Controller name. It's automatically done by default by removing the "Controller" part of the name. When we've created it, I've named it "ListeVinsController". If you had names if "WineListController", you'll be able to access the page by putting "/WineList".

At this moment, you can create new entries, edit then and delete them without any security. And you didn't had to write any code either to have those pages! This is the beauty of those ASP.NET MVC default pages. And yes, of course, you'll be able to modify the code later to adapt to your needs. I'll show an example later.
Step 5: Adding security
As I wrote in the first step, few tables are created for the users. One is important, it's called AspNetRoles. This is the one which contains the roles of users. The way the security is working in this MVC model is thru users and or roles. Users can be part of roles. I will use this notion of roles in the code.

I've create 2 roles in the previous table. I will use them later in the code. Be careful, they are case sensitive.
The AspNetUsersRoles is the table linking a user with roles. I've linked a use to those 2 roles.

I do this manually but of course, yes, we can also build simple pages to manage all this. But I'll have something like 5 users so I'll do it directly in the database ![]() Please note that in development mode, you have also a local database. You have to do this modification as well in the local base to be able to use the roles and the users.
Please note that in development mode, you have also a local database. You have to do this modification as well in the local base to be able to use the roles and the users.
The way to use this security in the code is working either by declaration either by code or both. I'll use only the declarative way. And it's very straight forward by adding [Authorize(Roles = "Admin")] to give access to the admin roles. By default, all anonymous connections are allowed.
// POST: ListeVins/Create
// To protect from overposting attacks, please enable the specific properties you want to bind to, for
// more details see https://go.microsoft.com/fwlink/?LinkId=317598.
[HttpPost]
[ValidateAntiForgeryToken]
[Authorize(Roles="Admin")]
public ActionResult Create([Bind(Include = "Id,Region,Description,Annee,Quantite,Rangement,Agarder")] ListeVin listeVin)
{
    if (ModelState.IsValid)
    {
        db.ListeVin.Add(listeVin);
        db.SaveChanges();
        return RedirectToAction("Index");
    }
    return View(listeVin);
}
You can define one or multiple roles, just separate them with a coma. You can do the same with users for example. But the notion of role is much more flexible than users.
[Authorize(Roles = "Admin,CanEdit")]
public ActionResult Edit(int? id)
{
    if (id == null)
    {
        return new HttpStatusCodeResult(HttpStatusCode.BadRequest);
    }
    ListeVin listeVin = db.ListeVin.Find(id);
    if (listeVin == null)
    {
        return HttpNotFound();
    }
return View(listeVin);
}
I did it on the Create, Delete and Edit functions which are the key feature to protect.
So if you are not registered or if you don't have the right to access a specific part of the code, you'll be redirected to the login page:
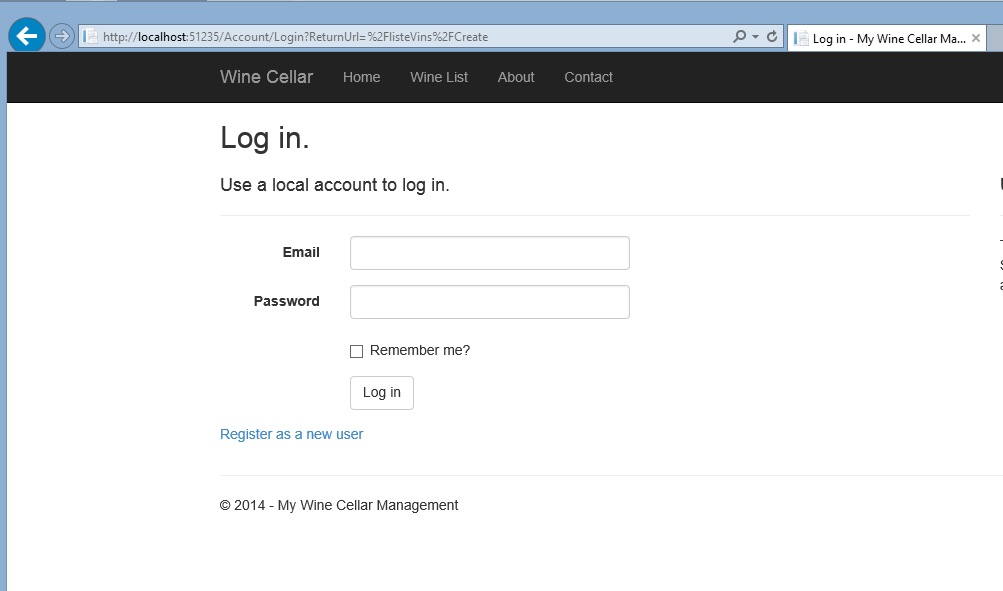
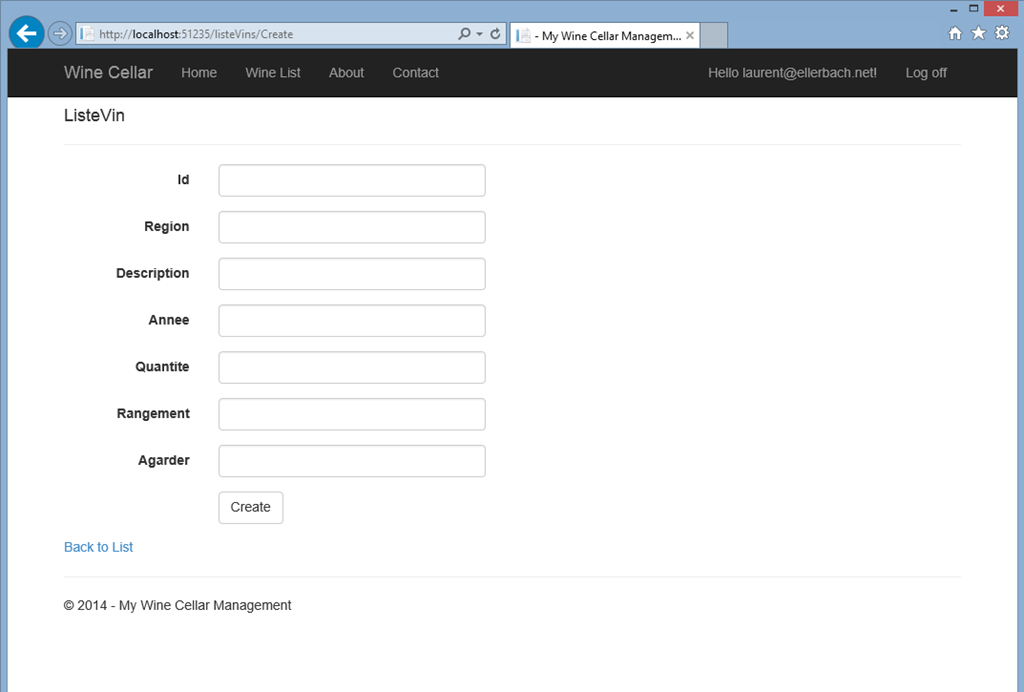
Once logged with the correct role, you can access to the Create page and create new set of bottles.
Step 6: Removing 1 bottle from the inventory
I've create a specific function in the controller to decrease the number of bottles on a specific set of bottle.
// GET: ListeVins/Decrease/5
[Authorize(Roles = "CanEdit")]
public ActionResult Decrease(int? id)
{
    if (id == null)
    {
        return new HttpStatusCodeResult(HttpStatusCode.BadRequest);
    }
    ListeVin listeVin = db.ListeVin.Find(id);
    if (listeVin == null)
    {
        return HttpNotFound();
    }
    listeVin.Quantite -= 1;
    db.SaveChanges();
    return RedirectToAction("Index");
}
The code is very similar to the delete one but I just decrease the quantity, save the changes and redirect on the full wine list. I don't test anything, quantity can be negative. Again, this is very simple but largely enough for my needs. I should add a nice message sayaing everything has been updates, etc, etc. But hey, I'll teach everyone at home. To call this function, I just have to go to"http://yoursite/listevins/decrease/1" to decrease by 1 the number or bottle of the bottle set numer 1 (replace yoursite by the url of your site).
This is not very user friendly as none at home will remember what to call in the url, the id of a specific set of bottles. And that's where QR Codes arrived ![]()
Step 7: Adding QR codes with a redirect on the good URL
I want everyone at home to be able to scan a RQ code sticked on a bottle with their Windows Phone (yea, it's also working with other smartphones as well but everyone has Windows Phone at home ![]() ) and that's it!
) and that's it!
But I'll need to generate the QR Codes dynamically when I'll create the set of bottles to be then able to print them and stick them on the bottles. Ho yes, this will take some time as I have quite a lot of bottles. But it's the price to pay to make it simple on the other side. And once it's done, it's done! No need to change them even if I keep the bottles for 20 years or more ![]()
I found a good QR Code project to generate QR Code on CodePlex: https://qrcodenet.codeplex.com/
Once downloaded and referenced in the project. The usage is quite easy:
public string GetQrCode(int? id)
{
    return "<img src=\"/ListeVins/QrCode?id=" + id + "\" />";
}

public FileResult QRCode(int? id)
{
    QrEncoder encoder = new QrEncoder(ErrorCorrectionLevel.M);
    QrCode qrCode;
    MemoryStream ms = new MemoryStream();
    encoder.TryEncode("https://yoursite/listevins/decrease/"+id, out qrCode);
    var render = new GraphicsRenderer(new FixedModuleSize(10, QuietZoneModules.Two));
    render.WriteToStream(qrCode.Matrix, ImageFormat.Png, ms);
    return File(ms.GetBuffer(), @"image/png"); ;
}
The GetQrCode function is just returning a simple string containing the call on the second function which does return a file, in our case an image. The image is generate dynamically by encoding the the URL. The image is generated in memory in a stream, the stream is saved as an image in the memory. In order to generate the right URL, change "yoursite" to the right URL.
Now, I have to modify the "Details.cshtml" by adding this QR Code in the list, at the end. GetQrCode will be called, this will create the image tag. The image tab contains a call on the QRCode image creation and the image will be displayed.
<dd>
@Html.Action("GetQrCode", "ListeVins", new { id = Model.Id });
</dd>
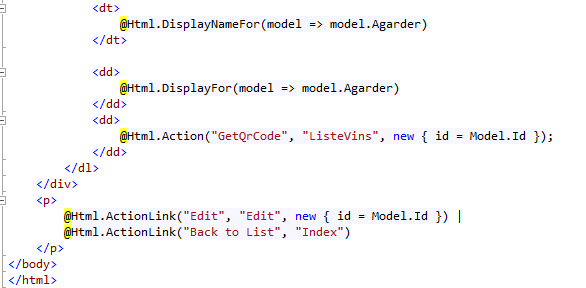
And as a result, the details page shows now the QR Code.
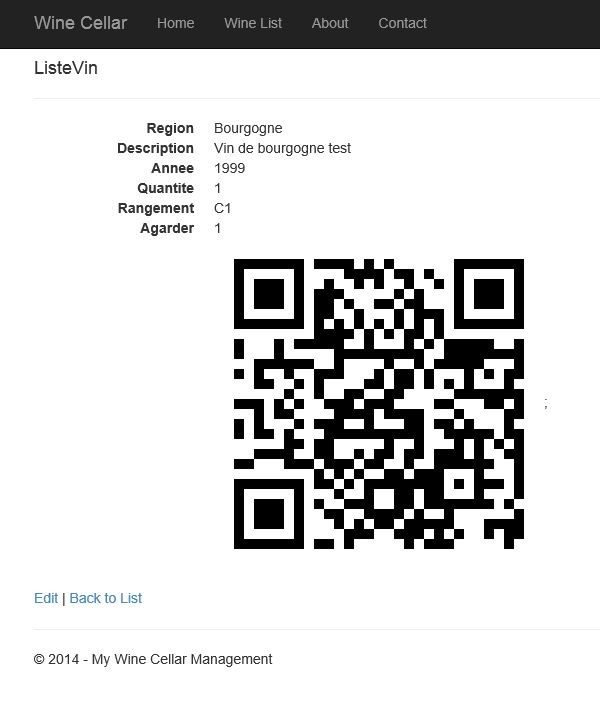
All what I need to do is copy/paste it in Word in a template that I'm using to print stickers, print them and stick them on the bottle!
As you can also see, I've customized the main menu of the website as well as the footer. You can do all this by modifying the cshtml files from the home folder as well as the Shared one.
Step 8: Scan and drink 
The last step is the user step. When anyone from the familly at home goes to the basement and take a bottle, he/she just have to scan the bottle using a QR Code app if they're not using a Windows Phone or directly the visual search (Visual Bing) using a Windows Phone. And if they've installed Cortana, they can use QR for Cortana for example and launch the filter which does the QR Code recognition.
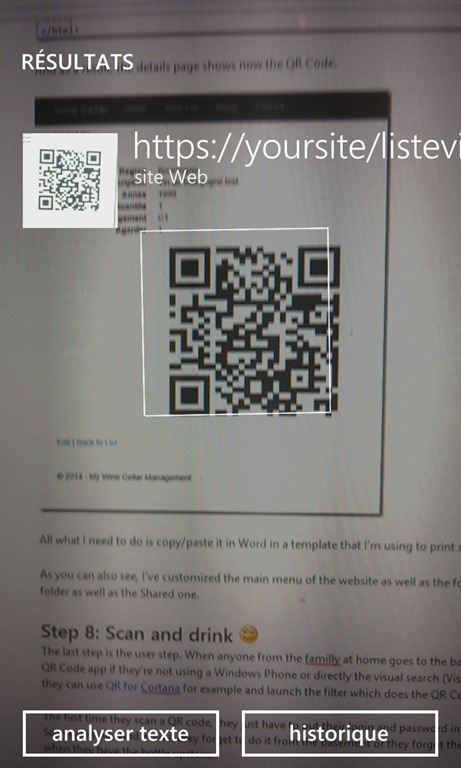
The first time they scan a QR code, they just have to put their login and password in the website (like in Step 5), click "remind me" and they're done for the other times. So very simple. And even if they forget to do it from the basement or they forgot their phone or whateverotherfakereasontheywillfind, I/they still can do it when they have the bottle upstairs.
Now I can enjoy a great bottle of wine ![]() Feedback welcomes on the article as well on wine of course
Feedback welcomes on the article as well on wine of course ![]()